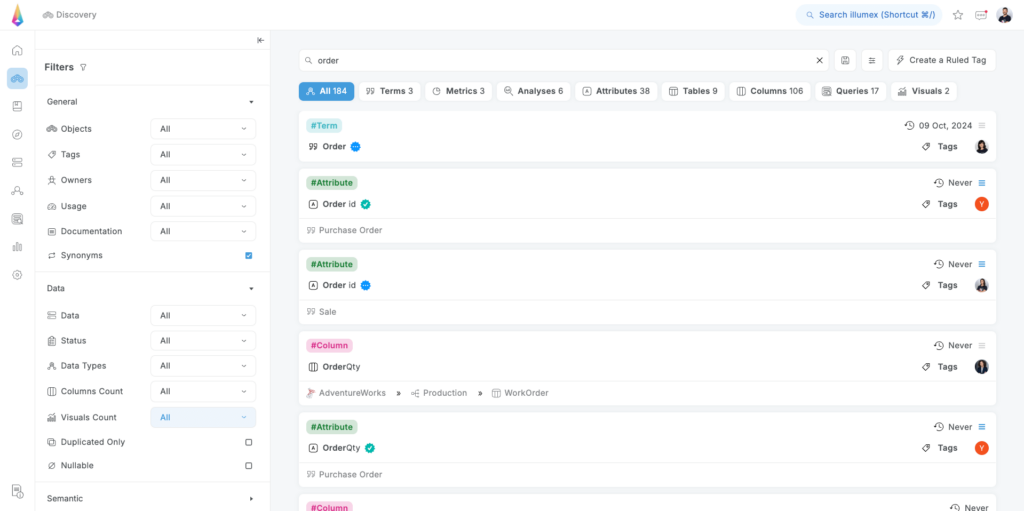
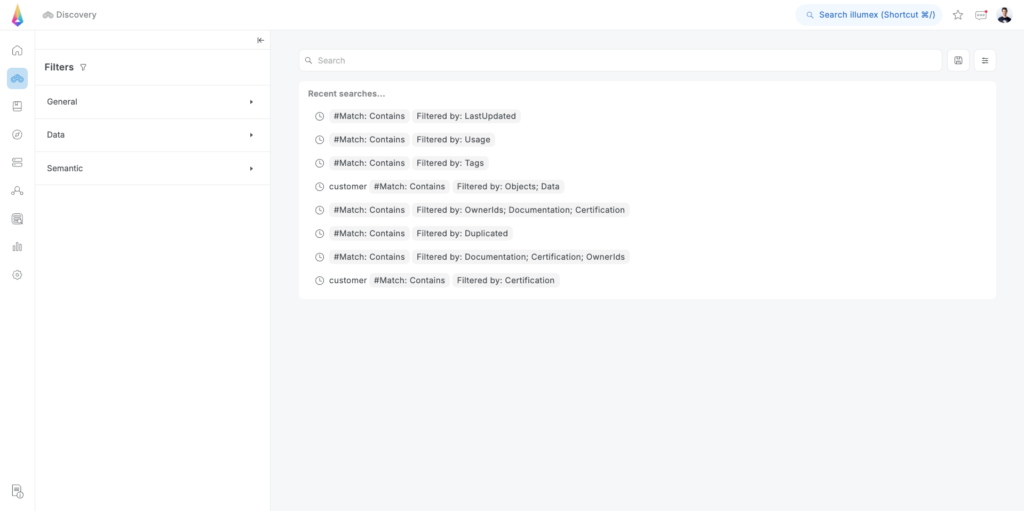
The Discovery feature empowers you to search for any entity within the system with enhanced intelligence and control. Similar to the global search, it is a powerful tool that allows you to find exactly what you’re looking for with the addition of advanced filtering capabilities that refine your query.
If you’re faced with too many results, you can further narrow down your search by applying filters based on virtually any attribute, including object type, specific tags, owners, or any other property.
To streamline your discovery process, we’ve provided several options to help you find exactly what you need:
Applying Textual Filters
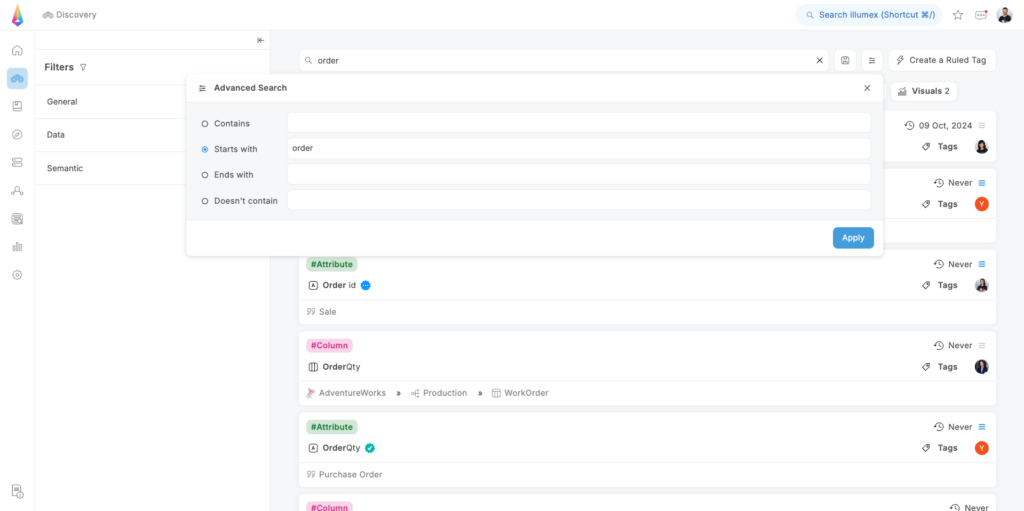
Don’t know what you’re looking for exactly? No problem! You can use the textual filter – such as contains, does not contain, starts with, or ends with – to help you find any relevant matches.
Steps:
- Visit the Discovery Page: Navigate to the Discovery page either from the left panel or by clicking the Advanced Search button at the bottom of the global search menu.
- Access Advanced Search: Click the Advanced Search button on the top-right corner of the page.
- Enter Search Criteria: In the search bar, enter any word or phrase based on your desired criteria. Use the textual filters to specify whether the text contains, starts with, ends with, or does not contain your search terms.
- Apply Filters: Click Apply to display the results.
Applying Advanced Filters
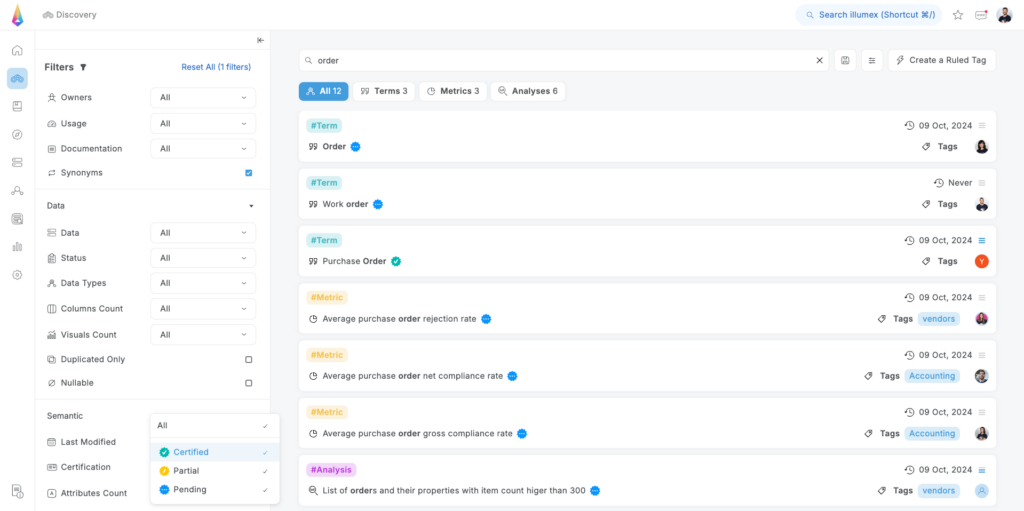
Discovery is not just a tool for searching for specific entities – it’s also a powerful query tool. You can use different countable and conditional filters to set up a constantly updated, report-like search based on your conditions:
Steps:
- Visit the Discovery Page: Navigate to the Discovery page.
- Reveal the Filter Panel: Click on the left-side panel expansion arrow to open the Filter panel.
- Enter Search Terms: Use the search bar to enter any word or phrase.
- Apply Filter Criteria: Apply any filter criteria that you desire, from either the General, Semantic, or Data menus. You can combine filters from general and data or semantic – a combination of filters from data and semantic menus will resulted in empty results set.
- View Updated Results: The results will update automatically according to the applied filter criteria.
Once the search results appear, you can notice that a new Create a Ruled Tag button on the top-right corner – to learn more about it, visit the Rule-Based Tagging page.
Saving your Search results
Sometimes you need to apply the same search and expect to get the most up-to-date results with the ever-changing data stack and business definition. To make it easier, you can save your searches for future reference.
Steps:
- Perform a Search: Visit the Discovery page and search for any word or phrase.
- Apply Filters: Apply any conditions or filters that you desire.
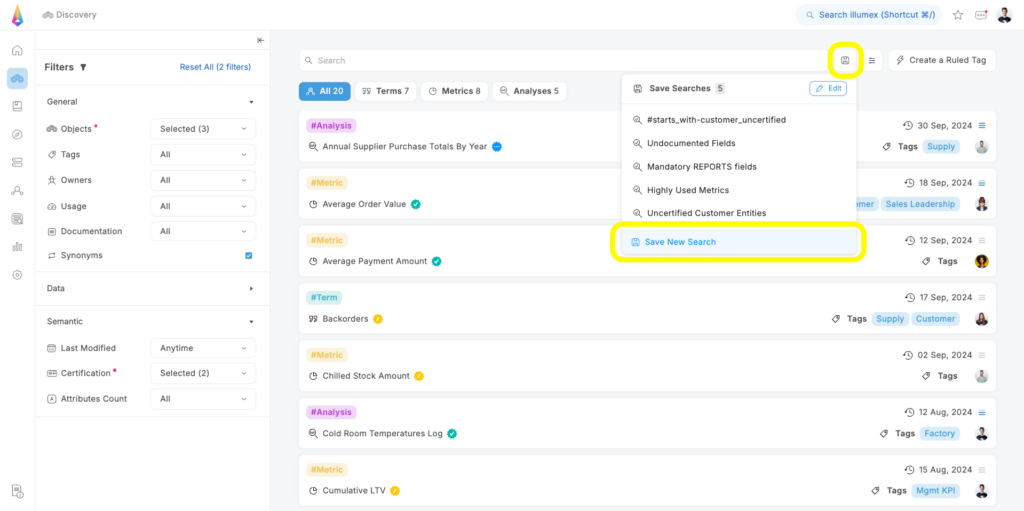
- Save the Search: Click the Save button on the right side of the page.
- Name Your Search: In the dialog that appears, click on Save New Search, enter a name for your search, and click Save.
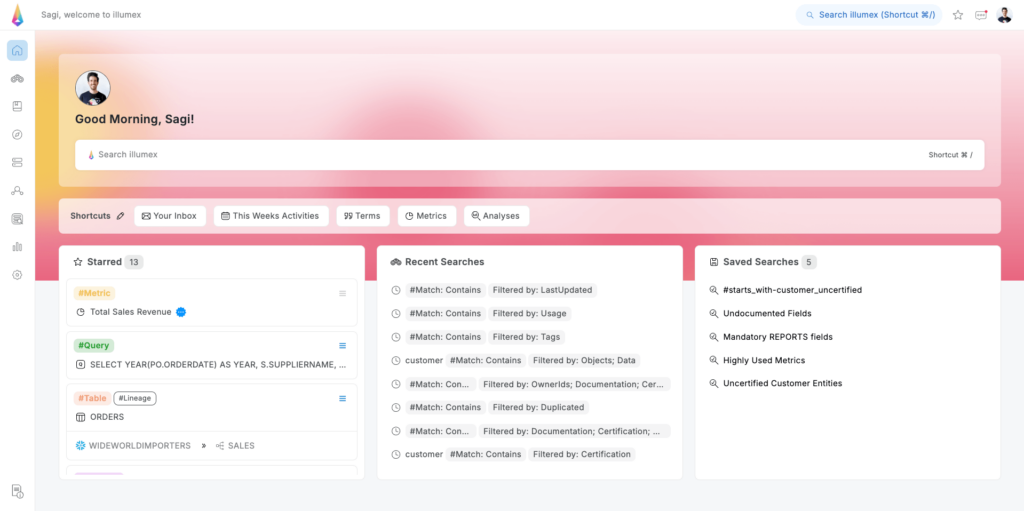
To find saved searches, you can either click on the Save icon at the Discovery page, and find all of your saved searches, or find them in the left-bottom part of the homepage.
Recent Searches
Can’t remember what you searched for yesterday? That’s what the “Recent Searches” feature is for – it keeps track of your previous searches, so you can easily access them without having to start from scratch.
You can find your recent searches either in the you can either in the Discovery page before a search is being executed, or find them in the middle-bottom part of the homepage.
With the Discovery feature, you have a comprehensive and flexible tool at your fingertips, empowering you to find the information you need quickly and efficiently, no matter how specific or complex your requirements may be. By utilizing advanced filtering options, saving searches, and accessing recent searches, you can streamline your workflow and enhance your data discovery process.
